How I compress GIFs using Photoshop
You finished an animation on After Effects now you need to compress it to fit a 3MB size limit your client told you the developers need.
There are quick solutions to convert a video into a GIF:
You have GIFgun you can install on After Effects
You also have websites like EZGif.com which do a great job.
But if you’re looking for more granularity in the controls of how the GIF is rendered my recommendation is good old Photoshop and its legacy Save For Web.
A GIF file size is dependent on multiple variants:
Number of frames – and how much each frame is different from the others
Number of colours – from 1 to 256
Canvas/Artboard dimensions – the actual pixel width and height
How you apply techniques like Dither and Lossy (on Photoshop).
There’s nothing like a real example, take our Motion Design thumbnail in our homepage:
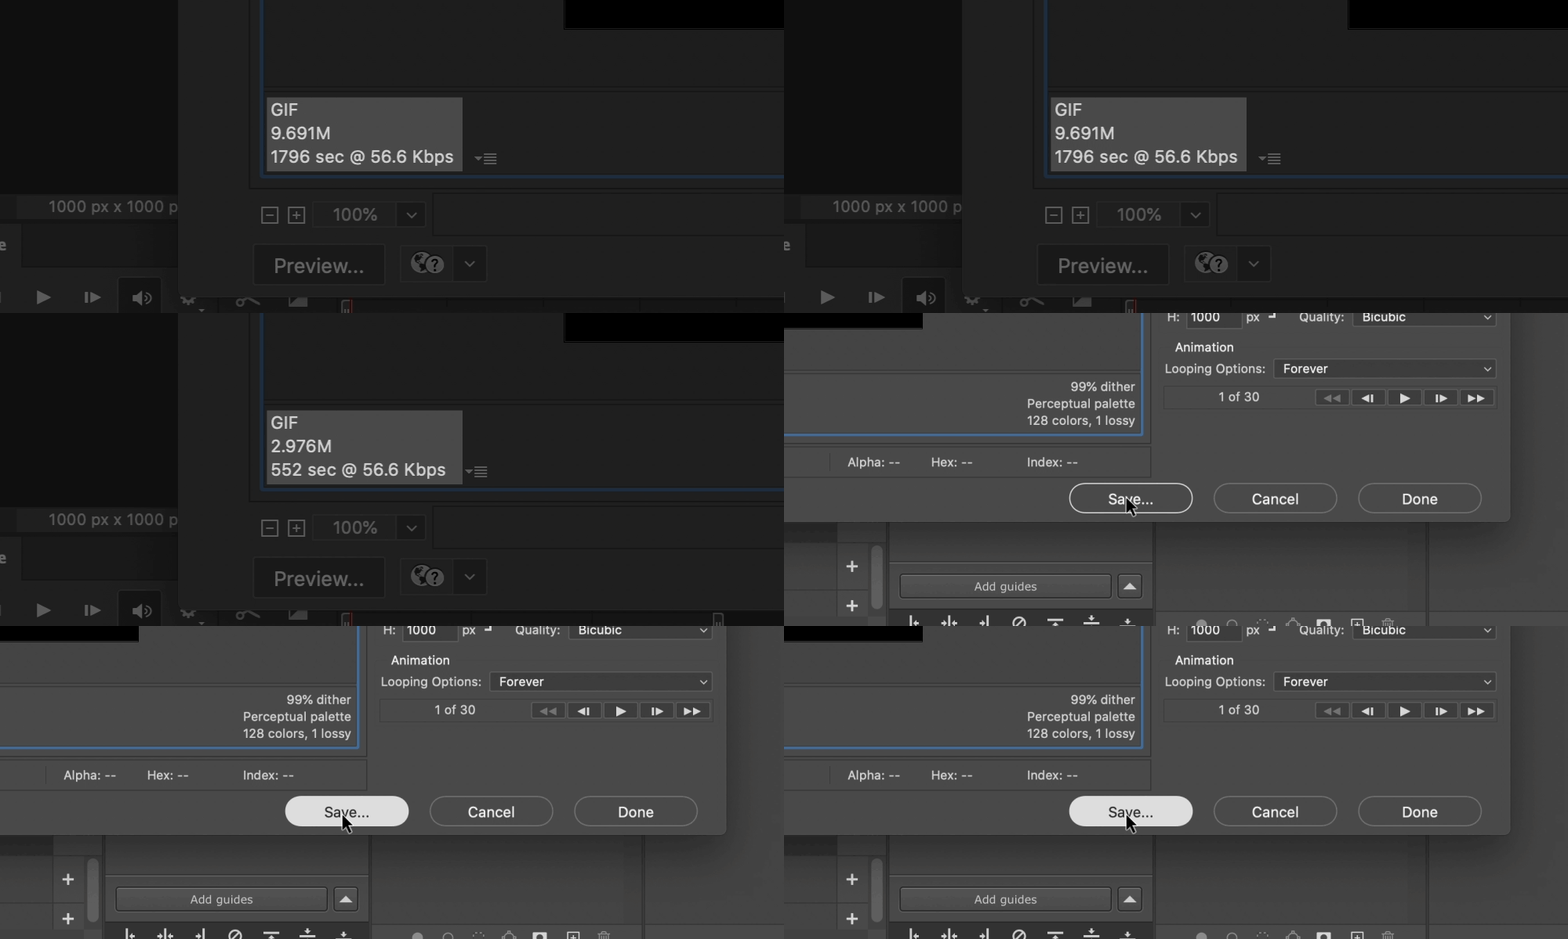
This GIF was originally landing at almost 10MB. With the techniques below I was able to bring it down to to 3MB (less 70%).
Step 1
Render the video using After Effects as a lossless MOV file.
Step 2
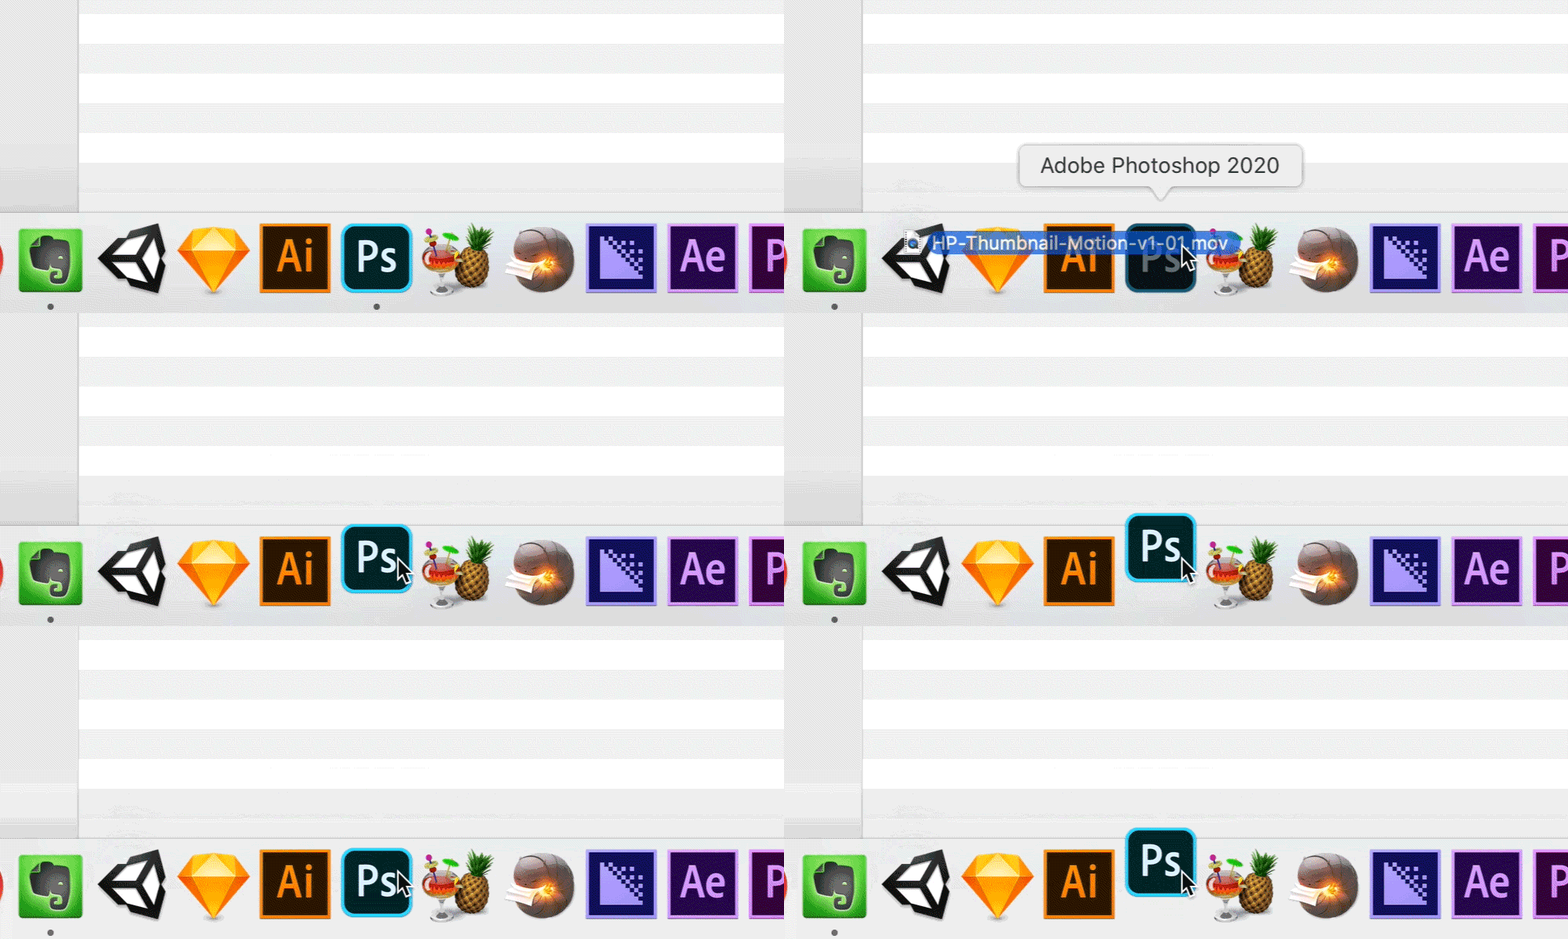
Open it with Photoshop.
Do not import the frames to layers, using the timeline feature will give us more flexibility.
Step 3
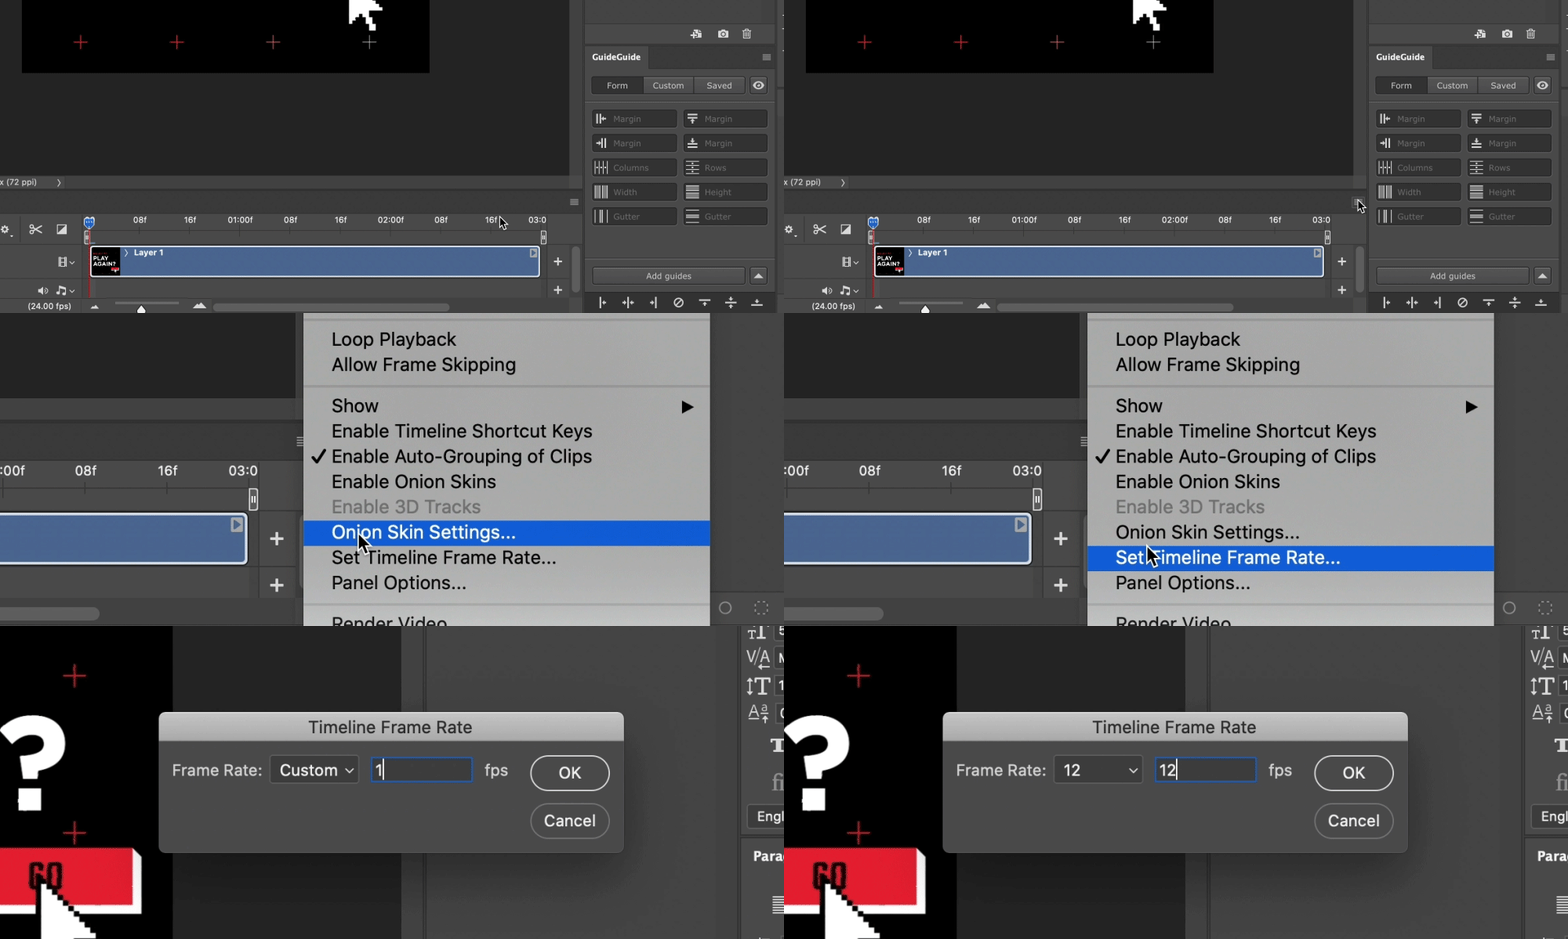
Reduce the frame-rate.
Let’s cut the frame-rate in half from 24 to 12. You can play around with the frame-rate until you find a good balance between the file size and how choppy the end result is.
Step 4
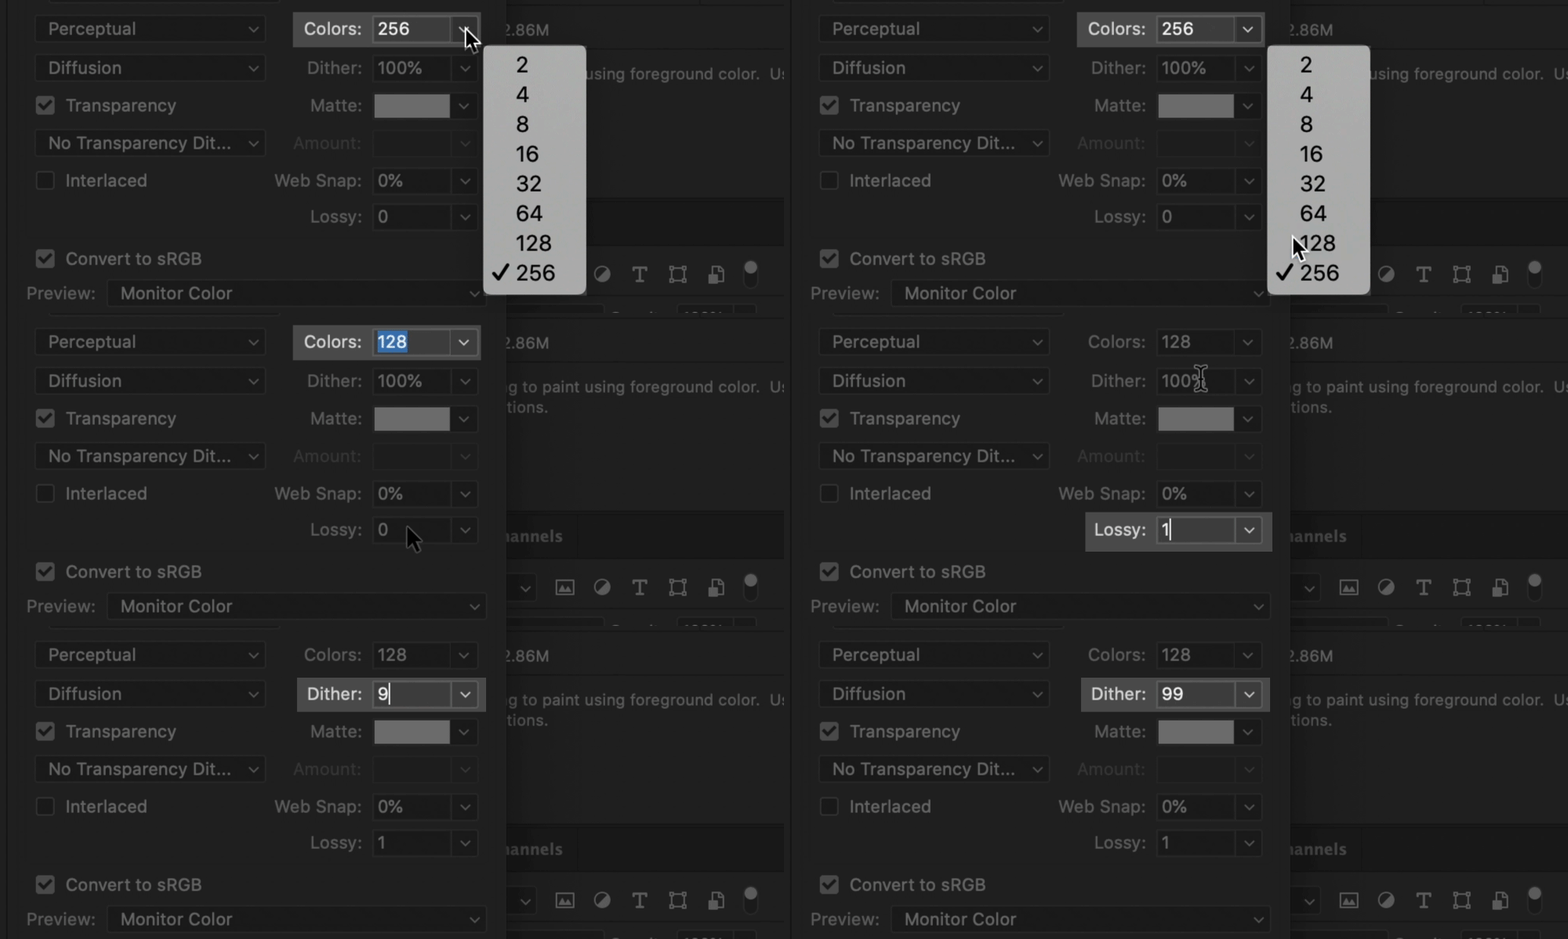
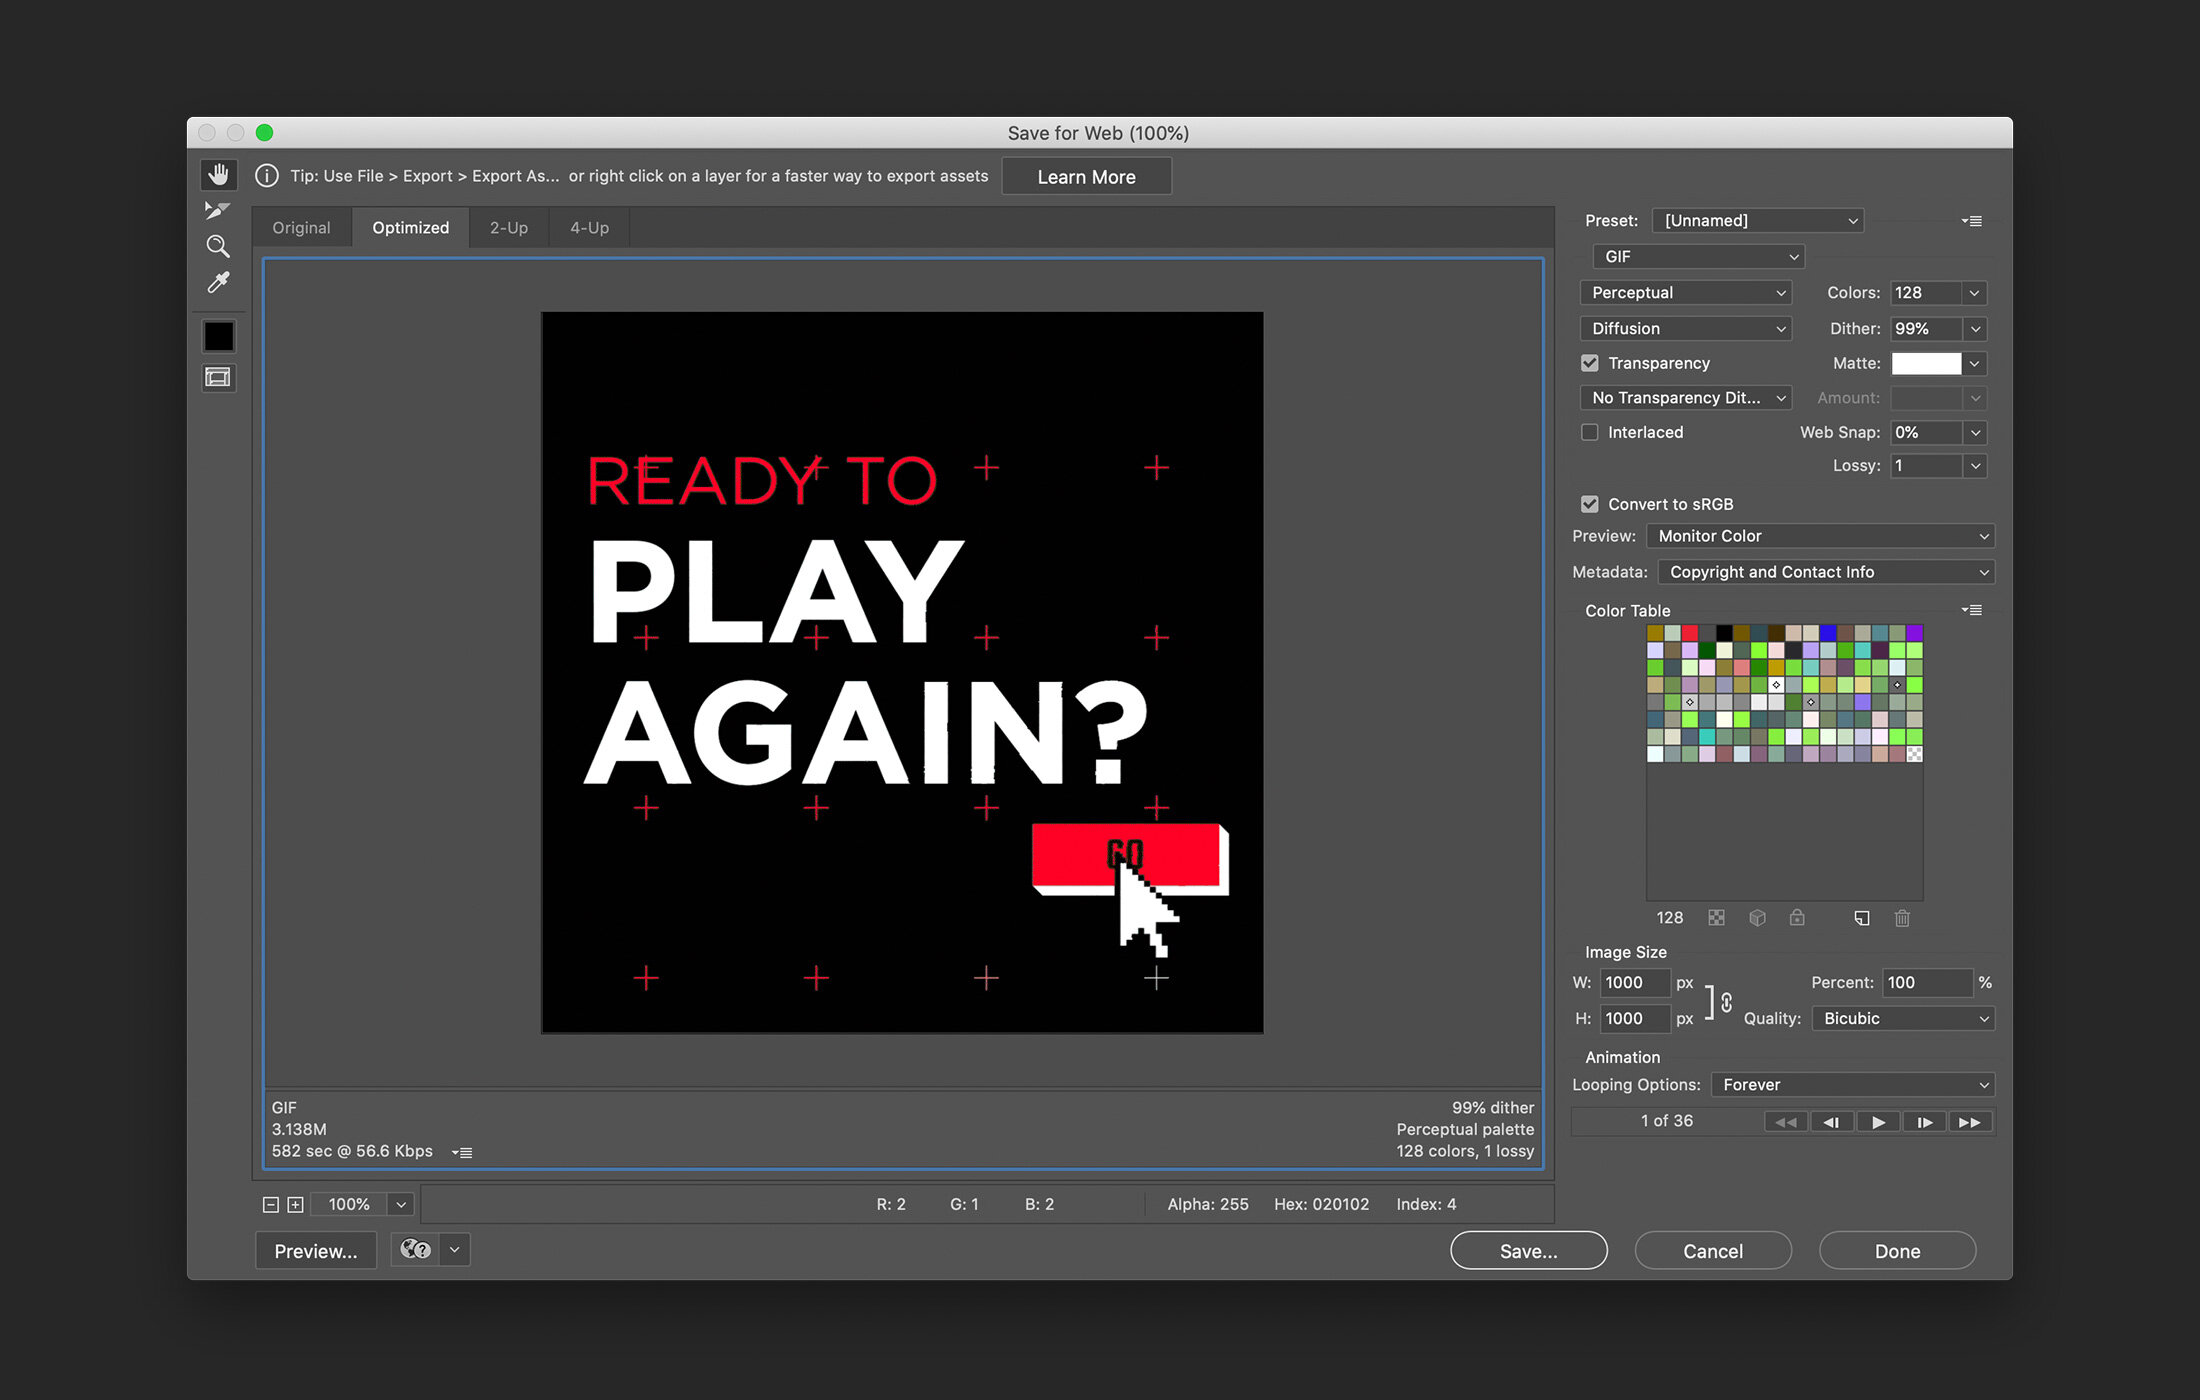
Colours, dither and lossy controls.
Let’s start small:
Cut the Colours in half (from 256 to 128).
Reduce Dither by just 1%.
Increase Lossy by just 1
In my case these small tweaks were enough to bring the file size down 70% but there’s a lot of granularity available with these controls. If you need to reduce the file size further try reducing Dither even more, or increase the Lossy amount. If these values your lose a lot of vibrance in the colour, maybe try leaving the colours at 256.


